Yamaha TX750 Restoration: Standing Around the Shop.
The whole time I was working on the brake upgrades to the TX, I was avoiding the engine. I want to rebuild the engine, but feel a little bit nervous about trying that kind of work. I really need to finish pulling the engine apart as it is the reason the bike is not on the road. To make my life a bit easier and do something to both delay tearing the engine apart and help with the rebuild, I found a coupon in my monthly Harbor Freight mailer and hit the road.

This is what followed me home. It is the Harbor Freight Pittsburg Automotive 750 lb. engine stand. My plan is to mount the TX engine to this stand for an easier time moving it around the shop and to save my back by elevating the engine off the floor. For $40 I really couldn't go wrong in giving it a go.

Here are all the pieces laid out to ensure that I have them all. It is a very simple rig designed to go together in about 20 minutes with the proper tools. I got the idea to use an engine stand from multiple videos on YouTube and figured I should try it. With two extra bikes in my garage for the next month or so, space is at a premium. Getting the lump of the TX engine up off the floor and mobile will alleviate some of the congestion and prompt me to get to work on it.

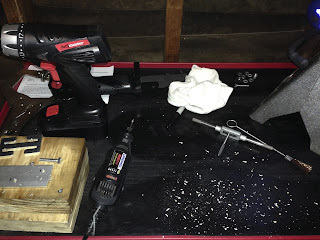
Here is all the hardware from the nut-n-bolt bag with the exception of the main bolt that holds the three main pieces of the stand together. Checking this stand out at the local Harbor Freight let me know that I need to really tighten the main bolt. The floor demo model was pretty wobbly from constantly being poked, prodded and inspected by potential customers. I used my 120V electric impact wrench to wail the bolt in tight resulting in a very solid assembly. For now I will leave it bolted as I may want to disassemble the stand for storage after the TX engine work is done. If it seems like it is going to work its way loose, I'll borrow a welder and make it solid.

Ten minutes after the last few pics were taken and I have something resembling an engine stand. The front wheel is a solid plastic swivel caster. The rear wheels are cast metal wheels just sitting on some welded in axles. There are no bushings or bearings in the rear wheels so it moves bit stiffly. I may replace them with something else like some locking swivel casters to give me a bit more maneuverability around the tight confines of my single car garage shop.

Here I am trying to envision the best way to mount the TX engine case to the engine stand head. The engine stand is meant for car engines. The car engine bolts to the stand head at the bell housing. Using the stands for motorcycle engines requires some finagling. I was thinking of trying to mount the engine crossways to the stand, but he clutch assembly on the right side as well as the stator assembly on the left side make that plan undoable.

Here I am brainstorming how the stand head would work at the rear of the bike's engine. The cylindrical chunk of engine just in front of the stand head is the lower rear engine mount that mounts the bike's engine to the frame. There is a similar upper mount just above it on the engine case. I will use these with some adapter brackets that adapt the side-to-side bike engine mounts to the fore-and-aft engine stand head.

This is the engine stand head on the stand body. The four arms are adjustable to fit a variety of car engines. The entire head can also rotate with the help of a bar in the rear. Once at the desired angle, you can lock the head in position with a locking pin. Once I get the brackets done, I'll have to play with the best placement of the arms to ensure a strong and stable attachment. The bike engine weighs a good 150 lbs. or more and I don't want it coming off inadvertently anytime I'm near it.
I did all of this work last weekend. This weekend I managed to work on the brackets and also get another 85 miles on the KTM. I can finally take it into the shop for its 625 mile/1000 km break in service. It will be nice to have the full rev range without the nanny light coming on when I twist the throttle too far. Come on back for more updates soon!
Blue

Comments
Post a Comment
Thanks for your comments and for following My Motorbike Obsessions!