The Amazing Multi-Gauge of Awesome!
Sorry for the gap in posting Motorbike Obsessions fans. I know my last post a full month ago was full of optimism about getting more content up, but life and lots of SoCal rain have kept me mostly off the bike. I did finally take advantage of the rain to get into the garage and finish this latest upgrade to the FZ-1.
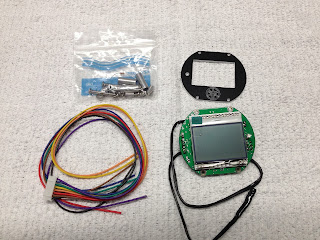
One of my first purchases for my new-to-me FZ1, was this sweet piece of kit. It is a digital Multi-Gauge. It takes the place of the OEM fuel gauge and gives me so much more information. Before I even had the bike a week I was on Paypal procuring this baby. Many other projects have taken precedence over installing the gauge, but the time finally came for me to get it going. Take a look at how it went.


First up is removing the side cowl trim pieces and the windscreen. The gauge cluster came out next. To get the bike to this point was only about 20 minutes of work. The beauty off Japanese bikes is that you can almost disassemble the entire bike with three metric wrenches and a JIS Phillips screwdriver.

I was so unused to thinking of the blog while doing the project this far that I almost forgot to take pictures. Here is the gauge panel after removal and right after taking out the stock fuel gauge that the Multi-Gauge replaces.

The old fuel gauge. I have nothing against it, but the new one will give me a bit of a modern upgrade for this early 21st century beauty. The bike is pre-fuel injection, but does have some extra computing power as compared to my old TX750. The new gauge makes use of this.

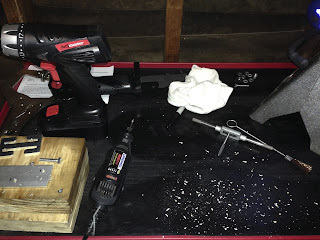
The point of no return. To mount the gauge and its wiring in the original fuel gauge location, I have to Dremel out the old low fuel light boss inside the gauge cluster. I guess I have to make it work from here or get creative with the superglue to go back to OEM.

After making the first cut I got the new Multi-Gague in place and attached the faceplate. The person from the FZ-1 Forum that I bought this from has five versions of he face plate to choose from. I went with the Yamaha tuning fork logo, because I am such a Yammie Fan Boy.

To get the gauge to work, you have to tie it into the original gauge panel with an eight wire harness. The new Multi-Gague wires solder to existing locations on the OEM gauge cluster circuit board. I worked slowly one wire at a time trimming and tinning each wire with flux and solder before final soldering to the circuit board. It was easy except for deciphering between the blue and purple wires since I'm color blind. The good wife translated those colors for me and I finished up without incident.

After I finished soldering, I put the gauge back together and plugged it in to give it a test. The original developer is from Germany and he made the first version for himself. It became a popular mod in Germany with the FZ crowd before spreading to the states. An FZ enthusiast here took on the project of importing the units for sale in America. He then took it a step farther and began producing the units under license to avoid adding import fees to each sale. Here you can see that it is working although it is displaying in German with metric units.

Once I knew the unit was working correctly, I buttoned up the cluster and finished assembling all of the body panels. I did break a windscreen screw which is plastic. That was annoying, but the entire rest of the project only took about three hours start to finish. I spent another 30 minutes programming the gauge to get it set up just right. The developers added a TON of features so there were many options to work through. I settled on the display above and now have water and ambient air temp (not just warning lights), battery voltage and fuel level in gallons. The best part is I now have a gear position indicator! I never thought of needing one of these, but after my adventures riding my buddies KTM 1190 Adventure, I realized how valuable they can be when riding sporty.
This past weekend I took the bike down the PCH into Malibu to get a ride in before another couple of days of rain. The Multi-Gauge worked superbly. It was very informative and I really enjoyed seeing the gear selection indicator click its way up through the gears. The angle of the carbon fiber trim makes the Multi-Gauge look off kilter, but functionally I love it. I will explore some of the other features and settings the gauge has over the next few weeks.
Thanks for coming back to the blog. I am working to keep the content coming in, but with the rain and work getting busy it will be a little slow for a bit. The spring season is going to be here before I know it which will mean more rides, car shows and even some flat track racing. As well I hope to get back out to the kart track and take the next level of California Superbike School. I can't wait!
Blue
Great stuff!
ReplyDeletecould you please tell me where have you bought this multi-gauge?
thank you in advance!
The seller is a member of a Yamaha FZ1 forum called the Yamaha FZ1 owners Association. There are multiple threads about the gauge and somewhere in there was information about purchasing one. The forum is here: http://www.yamahafz1oa.com/index.shtml
Delete