The little ripper needs a little whoa!
In my last post, I introduced a new addition to the My Motorbike stable of two-wheeled rides. Since then it has been an almost non-stop neighborhood rip fest for me and my youngest daughter. We've been running laps around the neighborhood on the MX350 and MX650 electric bikes. She is getting the hang of solo riding, but one thing needs work. Her brake control. Thanks to the wonderful world of the internet, I am doing the first mods that should help her go faster, while helping her go slower.


Here is the issue. The brake on the Razor MX350 is very good. It is a band-drum style brake that is common in little kids bicycles. The brake is effective, but too hard for her little hands to grip well. The actual lever pull is bigger than her hand is able to easily reach compounding the issue. She just can't grab a handful of brakes when she needs to. If she could, she'd feel more comfortable going faster. I have tried various things to adjust the lever pull distance and force, but nothing has really worked. A major overhaul is in order.

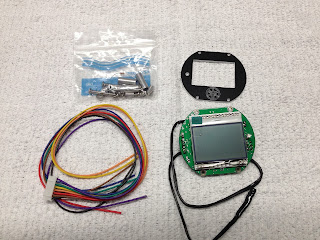
Here is how we are going to do it. This is a 160 mm disc brake. With it comes a cable operated mechanical caliper assembly. The MX650 bike has brakes similar to these. I've had my daughter try them out on the bigger bike and she seems able to squeeze the lever much more easily thanks to the lever action method of the calipers. Combined with the larger diameter disc as compared to the drum, there should be less force required to stop the wheel. The original brake drum is threaded onto the hub assembly. The kit came with threaded adapters for the hub. The kit I bought also included two calipers, cables, discs and adapters and various nuts and bolts needed to add disc brakes to an originally non-disc brake bicycle.

Since the bike didn't originally come with disc brakes there is no caliper mount on the frame. In addition to the brake kit I acquired, I also got these adapters that allow the caliper to mount to the bike's swing arm stay or fork leg. One part of the adapter slides over the axle and acts like a spacer between the axle and frame. The other side of the adapter clamps around the stay/leg. This positions the adapter in such a way to allow the caliper to line up with the disc. Originally I didn't notice that there were two size clamps made for standard bicycle sized tubes. Since the Razor MX350 isn't a normal sized bike, I knew I had some work to do to get it all functionally correct.


I got everything mounted loosely and adjusted within an hour or so. These are simple pieces and it didn't take much to put everything in place despite the lack of instructions. I didn't catch that there were two sized clamps and initially tried only the largest one which was way too big for the tube. I mounted everything with some zip ties for basic testing. Unfortunately, I got a bit too eager and broke the zip ties, jamming the caliper into the frame and locking up the rear wheel. This pic is a mock up of that disaster-to-come as I was eager to try it and didn't take a pick of the real thing prior to my destructive testing.
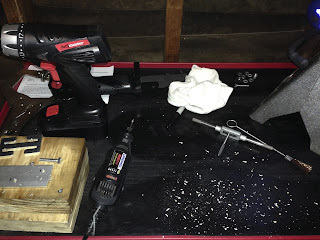
I removed all of the bent parts before quitting for the night. The next day I went through all of the parts from the kit and went back to work. I tried to tweak the bent caliper using my drill press as a press. I tested it with my dial indicator and it was better, but I switched it out with the spare from the kit anyway. The kit I bought came with a front and rear set of parts. I'll deal with the front brake and tweaked disc when the time comes. I used a spare cable and fixed the mangled cable sheath with some heat shrink tubing and mounted it up.

Here is the final product. I still have to trim the cable. I made a few adjustments and tested it with both my daughter and I as test riders. It doesn't feel as powerful as the old brake. The band drum brake has a lot of contact area between the drum and band. Much more friction to work with. The lever pull is much easier however. The grip-to-lever distance is still a bit too big for my daughter's hands, but she can pull the lever much easier. She already has a bit more confidence with her ability to stop. I can hear her hold the throttle on longer for more speed. I taught her to bump the throttle and coast until she gets the better at riding at speed. The throttle is more like a rotating on/off switch. You can't modulate the throttle like a real motorcycle.
For the $35 dollars or so I spent with this project I am happy with the results. I have a list of things I want to do to make it better. I'd like to weld a bracket to the frame for the caliper mount. I'd also like to replace the kit caliper with something better. Either a stock Razor one or maybe an MTB style hydraulic one. I also want to find a solution for the front wheel since the Razor MX350 doesn't have a front brake. We'll see what I can find. Hope this found you well. Ride safe friends!
Mat
Comments
Post a Comment
Thanks for your comments and for following My Motorbike Obsessions!