The time of my life, literally.
Now that I've had the CRF450 Flat Track bike for almost two months, its time to get serious with my maintenance. Getting to know a new bike is very much like those early days of being in a relationship. There's the little dance that goes with meeting for the first time and not knowing if you will like each other. Then there's the first few tentative dates where you progress from hand holding through all of the bases. After a bit, you settle into a relationship of mutual joy and understanding based on trust in each other's abilities and begin to have a bit of fun. Sometimes things go wrong and you have a bad breakup that hopefully doesn't involve either of you actually breaking something. One good way to end up in that last stage is to neglect your maintenance. I added a cheap, quick accessory to help me avoid the divorce-like action of blowing an engine or even worse. Scroll down for this easy project update.
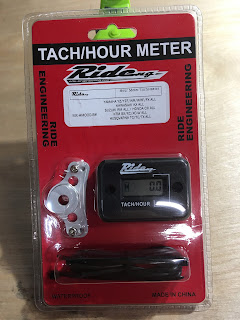
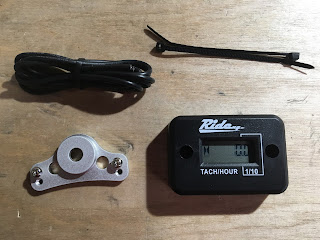
Dirt bikes don't usually have gauges. The rider needs to be tuned to the sounds and smells of the bike to understand what is going on during the ride. Maintenance actions are not determined by the miles you ride, but by the hours you put on the engine. I have a CRF service manual that tells me the hour intervals between the maintenance jobs. You could guess the hours based on how long you've been out at the track or in the desert, but that is a good way to either over estimate your hours and waste money on excess oil changes. Or you could underestimate and accelerate the wear your engine experiences. I picked up an hour meter at the local Cycle Gear for a cheap $35 and set about to install it on a wet Saturday afternoon.At the front of the bike, right behind the steering stem is an 8mm bolt that holds the front of the gas tank to the frame. This seemed the perfect location for the hour meter as it would be within an easy glance to read the engine speed and it would be up and out of the way in case of a spill. In this picture I am testing to see if my suspicions are correct and to also check which of the two sets of holes to use on the mount. I also had to plan for the length of the sensor cable. It has to reach from the meter to the top of the engine. The sensor cable was about two feet in length and this location seemed to meet the all of the marks.
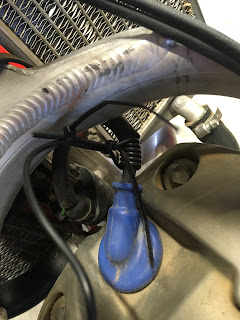
Once the location was determined, I had to remove the seat, side cowl plastics and the gas tank itself. This was easily accomplished with an 8mm and 10mm socket on a t-handle with a 6" extension. This bike could probably be entirely disassembled with just those two tools alone! Once I had the tank off, as you can see in the picture on the left, I was able to test fit the sensor wire from the gauge mount location to the engine. I found that I had plenty of space and would also be able to run the cable out of the way of any rotating or high heat engine parts. The sensor works by picking up the change in induction between the spark plug wire and the sensor cable as the high voltage from the coil passes through to the spark plug. To sense the voltage you have to wrap the end of the sensor cable around the spark plug wire several times and secure it with the included zip ties. I got six turns of the sensor cable around the spark plug wire in a spot where the sensor cable wouldn't come into contact with the cylinder head. I also learned that checking the valves will be pretty easy once I remove the gas tank, bonus!
Before I clipped the excess sensor cable, I threw on the gas tank and seat to fire up the bike and check the meter's function. In this picture you can see that the engine is running at 1000 rpm. I gave the engine a few good 'braps' and watched in delight as the tach responded smoothly and quickly up the rpm scale. I still don't have a time reading as I haven't run the bike for at least six minutes, but it should work fine if the tach does. Once I had a satisfactory operational check, I clipped the end of the sensor cable and buttoned up all of the panels and the seat. Just for fun I gave the bike another kick and watched my new tach rev up and down as I puttered around my cul-de-sac.
In total this job only took about 45 minutes mostly due to the easy nature of dirt bike disassembly. Here is the final project mounted up and ready to go. As you can see it is very discrete, but easy to read if needed. I have to plan my maintenance schedule and pick up some supplies, but I'm well on my way to settling into that long term love affair with this bike that I lead this post with. With the small track we are riding, we run in a lower gear, but at high rpm. Ask 10 other riders how often they change their oil and you'll get 10 different answers varying from by-the-book to 'do what now?' It is almost as bad as asking what tire pressures they run. I'm more of a by the book-guy-myself and now I can get a good handle on how hard my practice sessions run the engine.
Speaking of practice, it will be a few weeks before I can get out to the track to ride. I may try and sneak out to a local MX park and ride some of the easy tracks to get some TT style practice. I will be going to some Speedway bike races that will also have a contingent of Hooligan Flat Track racers present. It should be blast. I'm hoping to meet up with a couple of local guys that put on a cool podcast. We have been corresponding through email over the last couple of months and it would be nice to meet in person. Ride safe and see you again soon!
Blue


Comments
Post a Comment
Thanks for your comments and for following My Motorbike Obsessions!