More Belly Pan Mods
I made a Harbor Freight run right after work yesterday. It was a good excuse to get out and continue to scrub in the new tires on the V-Strom. The weather was perfect SoCal sunny and cool albeit a bit windy. I picked up some things to make the work I'm doing on the belly pan a little easier.
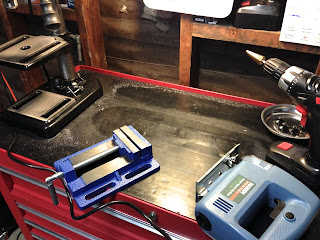
Lets just start with a gratuitous shot of my messy work bench. I had metal and plastic chips flying everywhere. I spent as much time cleaning as I did working last night. Especially with the metal pieces, I need to keep the floor clean so I don't damage my tires with an errant piece of safety wire or metal chip.
Lets get to the work. I started by taking the sanding drums I picked up. Using my right angle pneumatic die grinder, I cleaned up the side vent holes in the stock lower fairing. After sweeping up the pound of plastic dust from that job I proceeded to cut the cake pan belly pan using a metal cutting blade on my jigsaw. You can see from the picture above that I kept the bottom and one end with a little extra to make the rear fluid damn.
I slotted the two stub sides just in front of the rear dam portion so that I could slide the metal pan onto the stock plastic. I will need to ensure the sides are properly tied together and I will have to trim the rear dam so that it clears the exhaust headers. After a couple of trial fits, it looks like it should work. The lip of the original cake pan adds strength, but also interferes with shaping things to fit the back end of the unit. I will have to work out some kind of mounting system as I have the stock lower fairing holes and frame mounts, but none of the rubber isolators and spacers for them.
There is still plenty of shaping and grinding to be done. I also need to fill in the sides and front of the stock lower fairing. The mounts for the upper to lower fairing have all been broken off the upper fairing, so that is another project to do. I'd like to do something with Dzus fasteners to make taking at least some of the body off a quick job. I need to find some oil absorbing mat to line the bottom. Then of course paint and stickers. Each sticker is guaranteed horsepower and I have a stack of them.
Blue


Comments
Post a Comment
Thanks for your comments and for following My Motorbike Obsessions!