More 3D print fun to get a better ride.
In a previous post, I talked about my experience with the Lee Parks Total Control Advanced Riders Course. One of the things they did was talk to us about suspension set up. We checked our fork rebound compression and we also used a student bike to check front and rear suspension sag. They had some cheap Lee Parks Total Control labeled metric tape measures with neat little nubs that made the process super easy. I had a nice metric tape measure from my trip to Japan. I also have a 3D printer. I decided to marry the two and see if I could upgrade my suspension game.
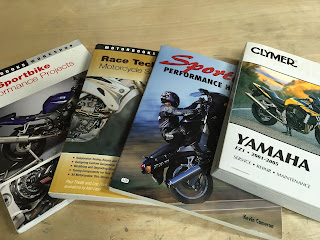
After the work we did with suspension settings at the course, I went home a did a bit of research with some of the books in my library. The Lee Parks Total Control class referenced the Race Tech book quite extensively. I used it when I was setting up my Ninja 250's suspension for track riding. Between the three technical books and my Yamaha's workshop manual, I was well prepared to dive in and see if I could a sportier ride. A common theme between all three of the technical books was getting your sag settings right. As I mentioned in the opening paragraph, measuring sag starts with a good metric tape measure. You can use a standard imperial style one, but the math gets obnoxious very quickly. Mine was a decent one, but it was missing one thing that would make it even more useful for motorcycle suspension tuning.The Lee Parks tape measure we used had a small nub on one side that allowed the user to take advantage of the hollow axles most modern bikes have. When measuring sag, it is vital to get consistent measurements. Having a little nub that you use to insert the tape measure into the hollow axle makes getting repeatable measurements very easy. Since didn't have a nub on my tool, I whipped out my CAD program and got to work making a simple model that I could use to modify my tape measure. I haven't used Fusion 360 for a couple of months. It was pretty easy to remember and I designed a very simple print that would be complete in about 20 minutes of printing time.
Here is the final print. I measured the axles of both my FZ1 and my CRF450R and came up with a set of measurements for the design that fit both. I oriented the print so that it would be an easy print job and set the 3D printer to work. Approximately 20 minutes later I had a useful print ready to test. I took my tape measure, removed a sticker from one side and shaved down a few small protrusions that would keep the print from laying flat against the case of the tape measure. Hot glue was my adhesive of choice for this operation. Nothing of what I'm doing is structural and I wanted to be able to remove the nub print if I wanted.
Ta-da! Any easy mod for my inexpensive metric tape measure. I made the base circle a little too think at 3 mm. Part of why I did that was so I could remove the print if I wanted to. Hot glue will pop off cleanly. The center cylinder nub fit in both my CRF and FZ1's axles just fine. This tape measure has your standard locking feature common to most other tape's. This one also has a circular, momentary hold button that may be handy for my intended use. It is times like this that I love having the ability to come up with ways to use my 3D printer for motorbike related prints. The whole process from idea generation to finished tool took about 90 minutes.
Here it is in action. On the left you can see that I insert the nub into the hollow axle shaft. This gives me a convenient and consistent start point for measuring sag. On the right I did a test measure on the FZ1. I picked a fixed point vertically above the axle. Again, you want something repeatable and fixed so that when you measure you get repeatable measurements. In this case I used the rear reflector. The nub made it easy to get everything lined up for measurement. I measured several times and got the same reading on my tape measure every time. I also did a quick test on the front of the FZ and the rear of the CRF. Every time I measured it was quick and easy. I will call this project a smashing success. Now I just need to train my wife on the finer points of measuring sag as you definitely need at least two people to do this process.I still have to do the write up for my last race. I have a helmet camera video to edit as well. Spoiler alert, I came in last again, but I still had a great time. This weekend I my just take a nice canyon ride and I may be going to a large SoCal Motorcycle swap meet if the family is up for the drive. Come back soon for more exciting motorbike action. Ride safe friends!
Blue


Comments
Post a Comment
Thanks for your comments and for following My Motorbike Obsessions!