Thinking of left turns and oval tracks.
You ever let your mind wander when you were at work or school? Well the end of the year was approaching and my mind was starting to think of the upcoming winter break between school terms. My winter break is three and a half weeks long. Lots of time for some Motorbike activities. One day in class when we were reviewing micrometers for the 50th time, I started using Google maps with satellite view to scout out places to ride fast or at least fast-ish. I happened to see that an MX track local to me had a small oval track. The fire lit itself under my butt to get my CRF450R back into commission. Let's dive in and get to work!
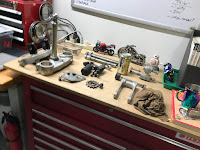
Step one was to finish the scrubbing. In the last post I talked about my impromptu parts washer. I used it to wash most of the small parts and plastics that could easily fit into the bin. What was left was the bigger pieces. Most of these are awkward and a bit ungainly. First was just a quick scrub and de-grease. I grabbed a plastic tote and an assortment of brushes and went to town. My youngest daughter helped out with the scrubbing and I appreciated the help. Lots of small nooks and crannies that held a few years of dirt and grime needed to be attended to. After scrubbing the frame, the swingarm and a few other pieces, I left everything to air dry while I attended to some other shop work.
This CRF has been used and abused like most of these workhorse Hondas have been. This use has left its mark on the frame in the form of stains in the aluminum and other discolorations. To try and clean some of these up, I bought some aluminum wheel cleaner and went to work. I got the idea to use the wheel cleaner from a YouTube channel. I really want to build my own vapor blasting cabinet, but time, money and space concerns rule that out for the time being. The wheel cleaner was effective, but it wasn't a magic bullet. I went over all of the aluminum parts and was happy with the end result.
When I bought the bike back in 2018, it had on some very old and blasted Mitas Flat Track tires mounted. At the time, the tires were definitely NOT the thing slowing me down. After three years in storage the tires didn't age any better. It was time to get them off and put on some fresh rubber. I ordered up some Shinko flat track tires from Revzilla and proceeded to sweat, swear and fight these old tires off the rims. It was tough. The flat track tires are very wide and flare from the bead to their ultimate width. Getting under the bead with my tire levers was gouging the rim. After a couple of attempts, I remembered an idea I saw somewhere and used a couple of bar clamps to pinch the tire beads together and give me some extra room to get the bead over the lip of the rim. Once I figured out the technique, I was able to get the tires off. While at it, I also pulled off the ancient supermoto slicks from my spare 17" rims.
Once everything was clean or at least as clean as I was willing to accomplish and my wheels were tire free, it was time for reassembly. Honestly there were a few days between finishing the cleaning and starting this next phase. I was a bit nervous about getting the engine back into the frame. The driving force for pushing through it was knowing that once the engine was in, everything else was going to be easy. After too much struggle, removal of the valve cover and more than enough swearing to prompt my smaller child to know it was time to leave the garage, the engine was mounted. My only thought was why couldn't they just make one of the brackets a bolt in? If there was just a bit more room I could have gotten it easily or at least easier. All of the bracket pieces are welded in anyway. It wouldn't have taken much more brain power to make one side a bolt in piece for smoother engine extraction!
After the engine was in, the rest of the bike didn't take long. I went from a pile of parts on my bench to a motorcycle shaped object in a few hours. I took my time and consulted my manual for torque specifications and reassembly instructions. Once or twice I had to refer to a few disassembly pics to confirm cable routing or to find the place for a loose nut or bolt. It was good to see the bike beginning to take shape. by the time I was at this stage I was already on my winter break and so were my girls. Christmas was coming and I couldn't spend all day in the garage. The pile of parts left to attach was very small.
We'll stop here for this post. I hope you enjoyed your time seeing my progress reviving my beloved Flat Tracker. I have another post to make about my work with my tire mounting. I also have some other winter break posts in the can just waiting for me to leave the shop and spend some time on my computer. I hope your holiday season was great. Take care and ride safe friends!
Mat


Comments
Post a Comment
Thanks for your comments and for following My Motorbike Obsessions!