A Delicate Balancing Act.
I hoard Harbor Freight Coupons. I have been pretty honest about my willingness to throw my hard earned cash at them to get a tool for my shop. My philosophy has always been to try and get the best tool for the job at hand even if it is not the best one of that type tool. I would rather have a cheap tool meant specifically for one type of job that I will use sparingly than to rig up something using my other tools and have the chance a messing something up. I am a Mechanical Engineer so I'd like to think I know how to look at a tool and get a feel for if it is worth the price or not. Such is the case with the new piece of gear I picked up last weekend. Take a look below.

The Harbor Freight Pittsburgh Motorcycle Wheel Balancing Stand. A few months ago I changed the tires on the V-Strom. The time it took was extensive, but in the end I learned a lot and saved some cash doing it myself. I plan on continuing that trend. I rigged up a make-shift wheel balancing stand to balance the wheels. In the end worked very well. I did waste a lot of time setting it up to get it to work correctly. I picked this tool up with one of my precious 20% off coupons for only $32 plus tax. I read some online reviews and felt safe giving it a try for that price. Other comparable stands cost around $100 or more. Anything cheaper found on the internet was exactly the same as the Harbor Freight stand (no surprise there) and would have extra cost when you include shipping.

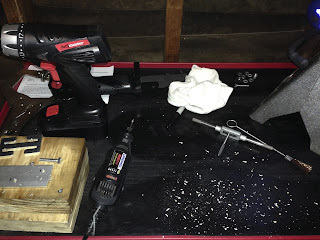
It came flat packed and disassembled in the box. 10 minutes of assembly with one socket and one Allen wrench were all it took. The stand works by using the shaft in place of the axles that rotates using a set of rollers mounted on skateboard type bearings. The purpose of the rollers and bearings is to prevent any friction caused by the OEM bearing seals from giving you false balance readings. You center the wheel on the shaft with the two metal cones. The cones lock onto the shaft with some grub screws. You then place the shaft & wheel assembly on the rollers and let the wheel settle. You mark the wheel with tape or chalk at the bottom of the tire in the 6 0'clock position. I then rotate the wheel 90° and release. If your original mark is actually the heaviest point of the tire & wheel assembly, it will rotate back towards the 6 o'clock position. I then take my wheel weights and tape them to the wheel opposite my mark using masking tape and continue the process until I have enough weights that the wheel doesn't rotate when I let it go. This stand should make that process a breeze compared to my other solution.


I will be trying this out on the little Ninja very soon. If it turns out to be too out of true I will take it back and consider it a lesson learned. If I publish this post before I test out the stand, I will update the blog with the results. Lots of new stuff in the works so please take the time to check back by soon.
Blue
Comments
Post a Comment
Thanks for your comments and for following My Motorbike Obsessions!