Hey readers, despite the hustle of changing jobs and getting ready to move house I have been able to squeeze some time in the shop working on the Ninja. I received my second set of clip-on handle bars a while back. I have been slowly getting to the point where I could re-install them. The last time I put them on, I destroyed one of the set. In the process I had to raise the forks in the triple trees to excessive levels. You can see what I did in my
hug the tank post. This time around I looked for a solution to avoid that. Read on to see what I did!
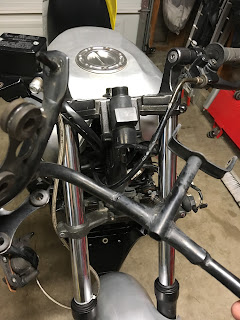
Just like last time I pulled the fairing off the bike. Since I don't have the mirrors mounted it is only four bolts to pop it off. It isn't a heavy item, but it isn't light either. I looked at the beefy fairing stay that you can see in my hand in the pic above and got the idea to mount the new clip-ons sans fairing. This would do a few things for the bike. It would drop some weight by eliminating the fairing and fairing stay. I could then mount the clip-ons under the top triple tree without interfering with the fairing like it did the last time I tried. It has its down sides as well. I would have to fab up a new bracket for the number plate and I would not be able to run with the stock gauge cluster. I decided to go for it.

I jacked the bike up with my ATV jack and dropped the forks in the triple trees enough to slide the clip-on clamp over the fork tubes. While I was at it I repositioned the forks 7mm lower in the the trees than before for quicker turn in. Originally they were at 13mm. I got the handle bars in a rough position and reassembled the controls. After lots of little tweaks and adjustments all while hopping on and off the bike a dozen or so times, I got the clip-ons in the right position. With the clip-ons mounted this way and the
foot peg brackets I made in an earlier project, I found myself in a true sport bike posture. Look at the pics above and compare how much lower the bars are to the stock bars. This will be much better for the track!
Now for the number plate bracket. I dug through a bin of random metal bits and found these two straps from my old home made wheel balance stand. Now that I have the
Harbor Freight balance stand I could repurpose them for this project. They already had most of the holes predrilled which will save some fabrication time. I mounted them on the bike where the OEM fairing stay lower mounts were and started to form my plan.
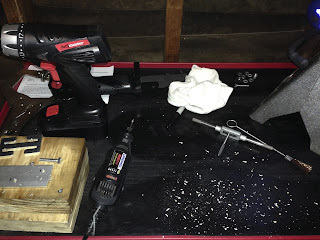
I broke out my various metal forming tools and went to work. Yes I have an anvil that is barley bigger than a cell phone. It is surprisingly helpful to smash out some quick brackets such as these. The metal brackets are steel, but are not hardened in any way making adjusting the fit very easy. Projects like these are fun, especially when I can take some junk from a bin and make something useful. One of these days I'll get more power tools and expand my capability to turn metal bits into other metal bits of varying degrees of usefulness.
I settled on a couple of 90° bends with the legs in the front curved to mount the front number plate. In the process of getting it just right I had to take all of the hoses, cables and wiring into account. Hopefully the number plate will act like a bikini fairing and steam the air overtop of my helmet's face shield and not act like an air damn.
A test fit of the number plate let me know that I was on the right track. I really like the 70's superbike race bike look that running the number plate like this gives the little Ninja. I have no issues with visability with this configuration. It kind of stinks not having the gauges and I'm on the hunt for a solution that doesn't involve hundreds of dollars of new gear.
I did have some issues with the fitment as you can see above left. Aside from the cables, and wires, the edges of the number plate bumped into the front brake master cylinder when I tested out the lock-to-lock turn of the forks. I had to adjust the bend of the brackets to get the clearance I needed. I didn't want to have any problems with tech inspection on race day. Above right you can see how I started to fix the issue. In the end I ended up with the two "L" shaped brackets without the center support bar.

Here is the final shot with the number plate all mounted up. It ended up lower than the above test. There are no problems with fitment. I had to put some new holes in the number plate. I attached them to the brackets with some windshield screws and well nuts from a set of spares I got for the FZ's wind screen. The mount is very solid and should be easy to see for any race organization's timing and scoring observer to see my numbers. Next up for projects are to get some kind of gauges as well as find a way to delete the stock key switch. I also want to mount a front camera and the SV Racing timer.
This will be the last post I do until I can get moved into my new house and get my new internet service up and running. I will have some new gear to review and a new two-car garage shop to set up. I hope to do some tests at the kart track and I really want to do a track day at Chuckwalla after it cools off out in the desert. Swing on back soon for another installment of the My Motorbike Obsessions blog!
Blue


Comments
Post a Comment
Thanks for your comments and for following My Motorbike Obsessions!