Pillion Peg GoPro Mount
Here's a quick mount that I whipped up out of some spare junk from my random bin of parts. I did it for my New Year's ride 2015 to get some deep lean shots in the mountain turns.
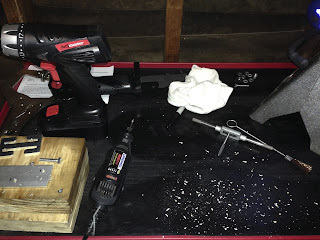
The tools I used and some of the bits I repurposed for the project. I used two metal plates to sandwitch the heel guard of the rear passenger peg. On the inside plate I mounted a GoPro flat mount plate. The camera clicks in and points either forward or backward depending on the GoPro orientation.
The rear passenger heel guard and foot peg. Because of the loop in the heel guard, I put the bolts through both plates and the loop. I used lock washers and threaded the inside plate to ensure that the mount couldn't come loose. It is also easy to put on or remove for use with saddle bag tie down straps.
Here is the completed mount. You could see that the GoPro J-buckle mount can't drop out of the GoPro flat mount plate because the outside metal plate prevents it from moving forward even if it started coming loose. To remove the camera I had to remove the 90 degree elbow and leave the J-buckle in place. The mount was surprisingly strong as I found out later in the trip.
Here is what you get from mounting this home-brew camera mount where I did. I put it on the left so that you can see the shifting action. I made sure that there was enough angle to see my clutch hand and point forward enough to get a sense of the road. Another plus was that the GoPro mic was protected from the wind noise and got the engine sound very clearly. I don't use this mount much any more as I have repurposed the metal bits for other projects. I have a list of favorite camera angles that I will eventually use to make some great ride videos. For now, head over to my YouTube Channel so you can see just how strong this mount ended up being…
Blue


Comments
Post a Comment
Thanks for your comments and for following My Motorbike Obsessions!